How To Prepare Soil For Sod

Sod installation is a gardening chore that homeowners often tackle themselves. Sod can replace dead grass and help create a beautiful, new, healthy lawn. Prepping the soil for new sod is essential before the actual sodding process.

This post will discuss the steps you need to take for a successful and straightforward sod installation process.

Soil Preparation: Basics For Laying Sod

Below are the steps to prepare the ground for installing sod to ensure your sod roots easily, turns into a lush lawn and lasts for many years to come. Refrain from ignoring the stages just to save time. Any step overlooked will leave you with more work in the long run and make you lose money.

Consider The Time of Year

Among the various determinants and procedures, timing is among the most crucial factor to take into account. You must ensure you coincide with the suggested time frame to create a lush new lawn.

Warmer Season

Warm-season sod must be installed in spring, including turf varieties like Zoysia, Centipede, St. Augustine, and Bermuda. These grasses possess optimum development during late spring and summer. Hence, installing the sod in spring guarantees the grass will be fully established by fall. You can also install warm-season grass sod in winter in certain areas, then nurture it to grow during spring.

Colder Season

Cool-season sod must be laid in early fall. While it may appear implausible, fall facilitates the most profitable maturation for grass varieties like Ryegrass, Fescue, Bluegrass, and Kentucky Bluegrass. By installing the sod during fall, the grass will root itself all through winter. This provides a more extended period of growth in spring before the summer heat comes. Cool-season sod laid in spring can wither and die by summer.

Soil Testing

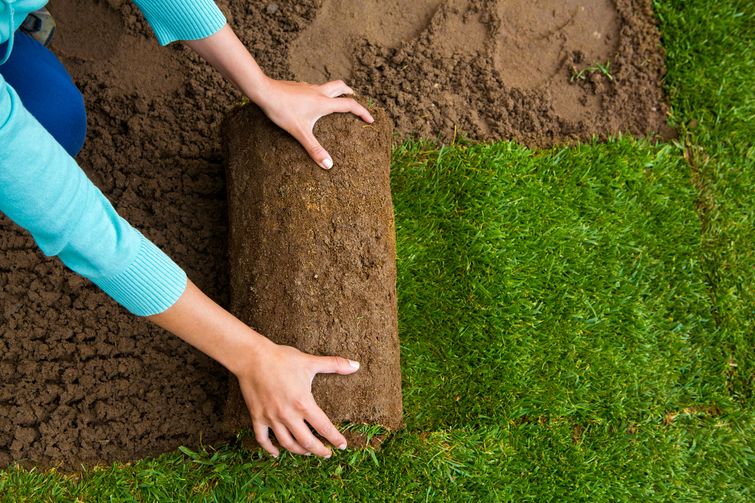
A man is holding a roll of sod.

A soil test will help you determine what you must add to your soil to make it healthy and prepared it for new sod. The findings will inform you of which nutrients the soil in your lawn is lacking.

To get a sample of your soil, fill a pail with the top 10-15cms or 4-6 inches of your soil from no less than ten various areas where you’re placing the sod. Then, contact your local extension office to find out how to submit your sample.

Submit your soil sample to a local extension service or local garden centres a few weeks before you intend on laying down the sod so you have time to receive the assessments.

Remove Existing Grass

You must never lay sod on top of old grass. Laying sod over existing grass increases the grade of your yard by roughly 1 inch (2.5 cm) and this can induce drainage issues and result in flooding.

First, apply a herbicide to kill all the vegetation and weeds on the site you plan to sod. Execute this at least two weeks before pulling grass. Exercise caution and wear proper safety equipment.

Next, remove the existing grass. You can rent a sod cutter from a local hardware store. Use the sod cutter to eliminate old grass and the top 3/4 inch (2 cm) of topsoil. By doing this, you enable the sod to be installed on the ground where it can grow roots.

Remove Other Debris

Clear the site from any debris on the soil. Remove rocks, stones, branches, and other materials scattered on the site. Don’t place your sod on top of any large objects as they could hinder the sod’s growth. Also, things below the sod will make the final appearance thick and bumpy.

Till the Soil

It’s vital to till the soil before planting new sod as it lessens compression, ensures good contact with the soil, and makes it more accessible for the roots to creep into the soil. Furthermore, the loose soil will absorb moisture better, mitigating the amount you need to rinse.

Dig down as deep as viable (3-4 inches is advised) and break up the soil using a tiller. Work through the area numerous times to smash any big chunks. If the soil is quite hard, it may be practical to water it the day earlier, making digging more manageable.

Add Soil Amendments

Amending the soil is when the soil test findings from the 2nd step become significant. Use the time now to enrich the soil and make it nearly perfect for lawn growth.

Typical soil amendments are:

After you’ve applied your preferred amendments, cultivate the soil again, about 6 inches deep, as this will incorporate the amendments into the soil for durable lawn growth.
A man and a woman laying sod in a yard.

Establish A Rough Grade

Rough grade the area to get rid of any drainage problems. Shelve the incline away from building footings, lower extreme elevations, and fill low-lying spots. Use a metal garden rake to level a small yard. Since a standard iron rake will need much effort, specifically for larger yards, use a tractor-mounted box blade for rough grading large spaces.

Add Good Quality Topsoil

When your yard has low areas after you try to flatten it, or if the ground is more than 2 inches below covered zones, you have to add topsoil to raise your yard. It’s essential to think about utilizing topsoil mixed with compost to incorporate top-tier dirt into your yard. Adding topsoil can help flatten a yard, control flooded sites, and promote appropriate drainage.

Apply Fertilizer

After your new lawn is established, it will require plenty of nutrients so that the root system will grow adequately. To provide your new lawn with what it needs to thrive at its finest, you’ll need to spread some starter fertilizer before the sod is laid. Preferably, rake the fertilizer into the top 1-2 inches.

For this prep work, remember to use the proper safety equipment and read the fertilizer’s instructions before initiating the method to guarantee that exact steps are followed.

Settle The Surface

You need to level out your soil again in preparation for installing sod. Use a lawn roller to settle the surface, and smooth out small lumps and air pockets. Fill in any low areas. If time allows, leave the site to establish further rainfall or an irrigation system.

Now, your area is prep to install sod!

Tags:

Curb Wise
Logo