Are you about to stain a deck for the first time? Have you done it once before but need a refresher? We’ve got you and your project covered!
Staining your deck will allow you to bring out amazing textures and create new tones on your wood’s surface. Applying wood stain does more than just enhance the appearance of a deck. Exterior stain or sealer can help waterproof your deck and provide protection from natural elements to keep your decking boards from warping or cracking. It’s important to note that a staining project is a lengthy process, taking multiple days and requiring planning around weather conditions. We have created a guide with tips to provide instructions on how to prep your deck for staining and how to stain your deck boards properly.
When Should You Stain A Deck?
How To Stain A Deck: Step-by-Step
Step 1: Check The Weather

Step 2: Choose A Stain

When choosing an exterior wood stain it’s important to match the stain to your deck’s type of wood and make sure that the stain is formulated to repel water, preserve the wood and protect it against UV rays.
There are two types of exterior wood stains, solid and semi-transparent. Each type of stain has its advantages to affect which one you will choose, but the type of stain already on your deck will also affect your choice. If your wood has a solid stain already on it you cannot apply a semi-transparent or clear stain over it. Solid stains plug up wood pores preventing semi-transparent or clear stains from being properly absorbed into the wood. Solid stains can be applied over any type of pre-existing stain. Similarly, if your deck is previously stained with an oil-based stain, you cannot apply a water-based stain over top of it. But, Oil-based stains can be applied on top of water-based stains. For the best results, continue to use the same based stain as previously used.
Step 3: Sand & Prep

Start by removing all furnishings from your deck. If some items cannot be removed, cover or tape over areas you do not wish to stain including areas like the house’s siding. If there are plants alongside your deck, moisten and cover them with a tarp to keep the stain from touching them.
Inspect your wood decking and make sure to repair all imperfections and replace all missing screws or nails. Sand down any splintered areas with 80 grit sandpaper using a pole or belt sander. Remember to take the necessary safety precautions when sanding. Sweep all dust and debris off of your deck and use a screwdriver or putty knife to clean between the deck boards.
Step 4: Give It A Wash

To get your stain to adhere properly to your deck, the wood needs to be free from all dirt and stains. Removing all dirt or mildew is needed otherwise you will trap them into your wood by staining it while they are still present.
To clean your deck, wash it with a deck cleaner. Wet your deck boards and apply the cleaner, letting it soak into the wood for 10 minutes or follow the instructions on the cleaning products label. Scrub the wood surface with a brush while the cleaner is still wet until you are satisfied. Finish cleaning and use a garden hose or pressure washer to thoroughly rinse off the cleaner. When using a pressure washer, be cautious of the amount of pressure and distance as it can damage your deck. Wait two to three days to dry before applying any stain.
Step 5: Stain Features & Railings

Before you stain you have to choose the right tools and brushes. Staining your deck with a brush made of synthetic materials is ideal for working with water-based stains. Natural bristles can lose their rigidity and go limp as they absorb too much water from the stain. If you prefer to use a roller, opt for a roller with a nap that’s 1/4 inch or shorter. This will let you apply a thin layer of the stain to the wood without pooling. Paint pad applicators are easier than brushing by hand and are more accurate than a pressurized sprayer for application.
Sweep the deck one more time to make sure all debris that could have settled when your deck was drying is removed. Stir the stain thoroughly before applying and make sure to follow your product’s instructions. Test a patch of your wood with the stain to make sure that you’re satisfied with its appearance. Begin with the deck’s highest wood points, such as all railings, posts and balusters. Make long, even strokes as you make your way from top to bottom. Brush over all runs or pooling of stain to ensure even results.
Step 6: Stain Deck Boards

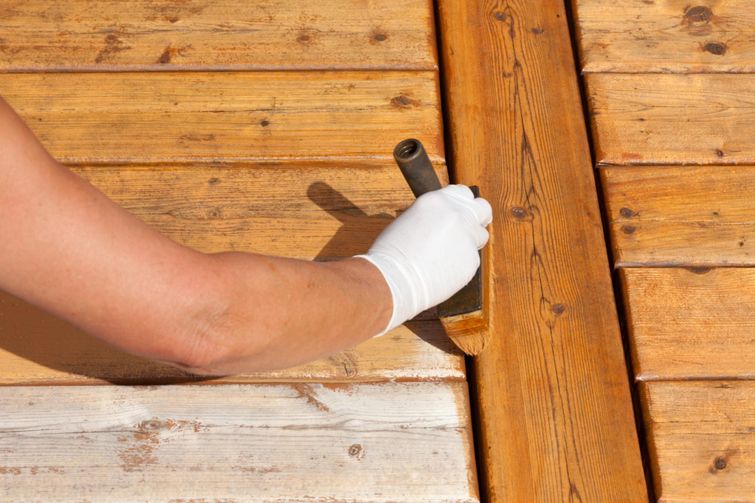
Choose the place you want to exit your deck from, like exterior stairs or a doorway, and apply stain moving in that direction. Paint one coat of stain in thin, long and even strokes. It is best to apply solid stains in thin coats and semi-transparent stains in even thinner coats. Doing so prevents puddles that will not soak into the wood and will cause those areas to flake off when dry. Go in with a paintbrush to stain between cracks or other problem areas. Typically, one coat is enough, but if another is needed make sure to wait for the first coat to fully dry, usually 24 hours, before re-applying. Make sure to read the product’s label for the best instructions on how to stain a deck with it. Once you are finished, clean the brushes and paint tray.
Step 7: Drying & Finishing Touches


