If you’re new to vegetable gardening or an experienced gardener, it can be challenging to understand how and when to harvest your produce. Aiming to grow an abundance of organic, homegrown vegetables ensures that you have nutritious, tasty, and sustainable food all year round. Our guide will help you learn the secrets to creating a highly productive garden with a substantial yield.
When To Harvest Vegetables
The ideal time for harvesting vegetables from your home garden is primarily determined by the duration of their growth. While there aren’t any strict guidelines for determining the perfect time to pick, there are a few basic principles to follow.
Such information can be discovered in seed packets. The variety of seeds is one factor that influences the harvesting time of vegetables, along with elements such as soil composition, climate, season, watering method, sunlight exposure, and the growing environment. Be it a garden, inside, or a greenhouse.
Everything said, it is ideal to harvest vegetables during the early morning hours, as this is when commercial farmers typically harvest their produce. Vegetables picked during this time tend to remain fresh and crisp for longer, while those collected in the daytime heat are likelier to wilt. If waking up early is not an option, the next preferred time for harvesting would be in the evening when the day’s warmth has subsided.
Certain vegetables such as tomatoes, zucchini, peppers, and various root vegetables (including carrots) can be harvested at any time during the day but should be placed in the refrigerator immediately after picking.
Garden Harvest Tips For Your Garden Vegetables
Pick Small
Do not wait too long to harvest your vegetables as they grow bigger. The desired size for optimal ripeness in most vegetable types is typically smaller, as they tend to be more tender and have a better taste and fewer seeds at this stage.
Be Gentle
It is crucial to handle vegetables delicately when harvesting them, as they are susceptible to bruising. Carefully collecting and placing them in a container can help maintain their appearance and overall quality. Damaging the outer cell walls may result in decay, ultimately reducing the time it can be stored and used. In such cases, preparing and consuming them promptly is necessary to prevent spoilage.
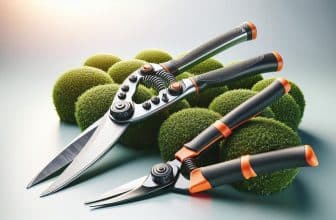
While it is not necessary to use tools for harvesting most vegetables, it may be helpful to use a small knife or pruning shears to protect the branch or whole plant from damage.
Check For Disease
While harvesting vegetables from your garden, it’s an ideal opportunity to assess the well-being of your plants too. Examine the leaves for any markings or discoloured areas, as these could be signs of a disease or unwanted insects infesting your garden.
If you seldom have the time to monitor your plants, make it a daily routine while outdoors picking. This way, nothing should go unnoticed, and the health of your plants should remain intact. It’s a straightforward step that can be crucial in preserving your harvest.
Harvest Stems Quickly
Certain vegetables and herbs do not yield fruit, and we consume the plant itself. It is preferable to harvest produce like herbs and lettuce at an early stage when they are tender and have an optimal taste.
Delaying the harvest may cause them to bolt, which can alter their texture and flavor. For the best outcome, harvest stems vegetables early.

How To Best Store & Preserve Your Vegetables
Disposing of the vegetables you cultivated equates to discarding the effort, hours, and finances invested in them. So, how can you prevent this? The way you manage and conserve your yield will influence its longevity, ensuring more of it is consumed, and less is wasted. Different vegetables require distinct preservation environments. Implement these suggestions for efficiently storing your garden harvest, and enjoy your crop for an extended period.
Bring Them Inside
As soon as you harvest your crop, make sure to bring it inside rather than leaving it outdoors. Exposure to sunlight can cause over-ripening, leading to a mushy texture.
However, if you accidentally harvested anything prematurely, you can place it in a sunny location like a kitchen window, terrace, or patio, allowing the sun to complete the ripening process.
Dark, Cool, Dry Place
Certain fruits and vegetables are better stored in the refrigerator, whereas others are more suited to being kept at room temperature.
In The Fridge
Summer squash, asparagus, yellow squash, green beans, broccoli, cauliflower, Brussels sprouts, peppers, berries, and cucumbers should be kept in the refrigerator’s crisper drawer. To prevent mushrooms from becoming slimy or moldy, store them in paper bags.
It is best to store corn on the cob with their husks still intact. Keep lettuce and other types of leafy greens in sealed bags. Another tip for asparagus storage is to place the stalks upright in a glass of water inside the fridge.
On The Counter
Most fruits, including melons, citrus, and tomatoes, should be kept on the countertop, away from direct sunlight. Apricots, peaches, plums, and nectarines, which are stone fruits, can be left on the counter until they ripen and then transferred to the fridge to extend their freshness.
In contrast, cherries should be stored in an airtight container or bag in the fridge immediately..
In The Pantry
Certain vegetables maintain their freshness for an extended period when stored in a cool place, away from moisture, heat, and sunlight. This could potentially be a kitchen cabinet (as long as it is not directly beside your stove) or a designated pantry. The perfect temperature range for your pantry is 10 to 20 degrees Celsius (or 50 to 60 degrees Fahrenheit).
Store onions, garlic, potatoes, and winter squash in a dry place.
Tomatoes, along with other vegetables like cucumbers and peppers, require storage in cool (13°C / 55°F) and damp environments. Other produce that thrives in cold, humid storage conditions are apples, broccoli, carrots, lettuce, and eggplant.
Root Cellars
Root vegetables and squash should be kept in a dark place that is also cool and dry, such as a root cellar or cupboard. Clean straw, hay, or wood shavings can be used as insulation, ensuring they are free from pesticide contamination.

Wrap Your Greens
It is ideal to consume leafy greens as soon as they are harvested, as they are at their freshest and most crisp during this time. These greens can quickly lose moisture and become wilted, so if immediate consumption is not possible, it is recommended to keep them wrapped in a moist paper towel and stored in a tightly sealed container to retain their freshness.
Can, Pickle, Or Dehydrate
The abundant crop can be preserved through canning, pickling, and dehydrating methods. Beets, green beans, cucumbers, and even shallots can be quite flavorful when pickled. Jams and canned chutneys can also be a delightful addition to your pantry during the winter season.
Pickling salt, free of additives and available in most grocery stores, should be used to prevent making the brine cloudy and affecting the appearance and texture of pickled vegetables.
Dehydrating fruits and vegetables doesn’t require any specialized equipment. Simply wash, dry, and thinly slice the vegetables before placing them in a single layer on a baking sheet, then bake at a low temperature (130°C/250°F) for several hours until dry.
Storing Tall Stalks
Consider utilizing empty jars for storing asparagus and green onions specifically. Empty jars with a quart size are ideal for this purpose.
Remove an inch from the bottom of the stalks and place them upright in a glass jar, ensuring they have ample space and are not cramped. You may need to use two jars for one bunch, depending on the quantity. Fill the jars halfway with water, then cover the stalks using a plastic produce bag, securing it with a rubber band.
This technique also applies to green onions, but remember not to trim the bottoms before storage.
Add Natural Preservatives
Lemon juice
Lemon, a natural acidifier, is frequently used in home food conservation. It is abundant in vitamin C, or ascorbic acid, which is a potent antioxidant that inhibits spoilage and decay. Comparable to salt, lemon juice extracts moisture content, stabilizing the food’s pH levels and innate acids.
Vinegar
Vinegar, a product of sugar and water solution fermentation, serves as an efficient natural preservative. The acetic acid present in vinegar eliminates microbes and prevents food from spoiling. Pickling is a widely-used technique for preserving food using vinegar while also enhancing its taste.
Rosemary Extract
Extracted from the distillation of rosemary leaves, rosemary extract is a potent preservative. Its anti-microbial properties consist of carnosic and rosmaranic acid, which function as barriers against decay. According to the Phytochemical Database, rosemary possesses over 24 antioxidants with a more extended activity duration than many other antioxidants.
Sugar
By extracting water and eliminating microorganisms and bacteria, sugar acts as a natural preservative for food. Widely used in fruit preservation, the elevated sugar levels restrict bacterial, mould, and yeast growth by retaining water. Sugar is often mixed with water in a flower vase to nourish the flowers, extending their lifespan.

How To Freeze Vegetables
Almost all vegetables can be frozen, except for cabbage and potatoes, as they tend to lose their crispness and become soggy. Freezing allows vegetables to maintain a taste closest to fresh, especially when they are meant to be cooked or steamed.
When well-prepared and quickly frozen, they can retain more nutrients than several “fresh” vegetables available in the supermarket, which might have been decaying for a few weeks before purchase.
- Arrange all your tools and materials within easy reach to prevent overcooking the vegetables while looking for items. It is essential to work in a tidy kitchen with sanitized equipment.
- Most fruits and vegetables freeze better when they’re raw, so be sure to clean, wash, and thoroughly dry them first. However, since blanching stops enzyme actions that can lead to a loss of flavor, color, and texture, this process is also beneficial. While preserving the nutrients.
- Place the vegetables on a cutting board and cut them into the recommended and/or preferred sizes for their intended use. Make sure to prepare the vegetables like you would if using them fresh.
- Blanching
First, immerse the fruit or vegetable in a large pan filled with boiling water for about one-third to one-half of its typical cooking duration. Afterward, promptly transfer it to ice-cold water. Once cooled, pat the produce dry and proceed to freeze it. For herbs, some people opt to chop and freeze them in olive oil.
Adding ice to water is recommended for quickly cooling blanched vegetables, as it helps to stop the cooking process immediately. When using ice water, stir the vegetables for even cooling. Generally, the cooling process should take about the same time as it took to blanch them. - After cooling the vegetables, strain them. Immediately package them and place them in the freezer.
Packaging & Container Options
Several suitable options for preserving and freezing fresh vegetables are available. Due to the diversity of vegetables, it is likely that you will need a range of packaging options. You should choose the ones that you feel are most effective for each type of vegetable in your freezer.
Ziploc™ Or Zipper Bags
The advantages of these baggies include their accessibility, speed, affordability, and functionality. It is essential to opt for heavier freezer bags rather than a lighter sandwich or snack bags. However, one downside is the difficulty in removing excess air. A helpful technique is to submerge the filled bags in a large water bowl near the top to push out the air and then secure the zipper closure.
Food Storage Freezer Bags
These storage bags resemble zipper bags but use twist-ties to close them. However, acquiring these bags in a freezer weight might be challenging, and they may require to be wrapped in freezer paper or double-bagged at a minimum (though not a perfect solution, it might suffice). Expelling excess air is more convenient than zipper bags, and the water trick can also be employed with these bags to push out air.
Vacuum Sealer Bags
Vacuum-sealer bag systems are highly effective in preserving the quality of vegetables for an extended period, provided the bags remain intact and free from air exposure. Although these bags are relatively durable and resistant to punctures, the initial investment for the system can be moderately expensive, with the bags being significantly pricier than traditional zipper or food storage bags.
Canning Jars
Canning jars are suitable for canning and safe to use in the freezer, making freezing purees, liquids, and mashed items more convenient and cost-effective. This is particularly useful when dealing with products that require packaging while hot or warm, where plastic containers might pose a problem.
Avoiding Freezer Burn & Ice Crystal Damage
Aside from enzyme activity, freezer burn and the development of large ice crystals are two main factors that spoil fresh-frozen vegetables. Freezer burn is mainly caused by inadequate packaging, which involves exposing too much surface area to air and using packaging that permits moisture loss or vapour exchange.
- To avoid the formation of large ice crystals that can damage the fibres of your vegetables, make sure to freeze them quickly.
- Utilize only freezer-grade packaging to minimize vapour exchange and harm.
- When sealing the packages, eliminate as much air as possible to minimize surface contact within the containers.
- To minimize surface exposure and the amount of air in the package, fill bags or packages as much as possible, taking into consideration that some vegetables, like mashed ones, may need about one-half inch of headspace for expansion to prevent containers from bursting open.
- Ensure that freezers are properly maintained and frequently inspected for temperature regulation. Operate them at a consistently low temperature (17 C or below). Try to prevent temperature variations and minimize the thawing and refreezing of their contents as much as possible.
Good Vegetables To Freeze & Recommended Blanching Times
- Asparagus – blanch small spears for 1 ½ minutes, medium spears for 2 minutes, and large spears for 3 minutes.
- Green beans or snap beans- blanch for 3 minutes.
- Beets – cooked until tender: small beets for 25-30 minutes, medium for 45-50 minutes, and large for 1 hour.
- Broccoli – blanch for 3 minutes if medium-sized and 4 minutes if large.
- Brussels sprouts – blanch for 3 minutes if small, 4 minutes if medium, and 5 minutes if large.
- Cabbage – blanch for 3 minutes if in wedges and 1 ½ minutes if shredded.
- Carrots – blanch sections, dice, or slices for 3 minutes, and whole carrots for 5 minutes.
- Corn on the cob – blanch for 8 minutes if up to two inches in diameter and 10 minutes if larger.
- Parsnips – peeled and blanched for 3 minutes, sliced, diced, or cut lengthwise into sticks.
- Snow peas or sugar snap peas – blanched for 2 minutes.
- Pumpkins and winter squash – cooked until soft, either by steaming or roasting at 375F (190C) in a pan with a half-inch of water, cut-side down, then mashed and frozen.
- Tomatoes – freeze without blanching or cooked, peeled, and then frozen, pureed if preferred.

Make The Most Of Your Homegrown Vegetables By Harvesting And Preserving
In conclusion, it is essential to keep a close watch on your garden vegetables to become familiar with the appropriate harvesting times. After gathering your produce, ensure that you store it at the proper temperature, with adequate moisture levels and sufficient air circulation for the specific crop. By doing so, you can minimize wilt and tissue breakdown and maintain the freshness and quality of your vegetables.
Colin Macmillan is a seasoned entrepreneur and the CEO of Riverwood Landscape, a leading landscaping company based in Canada. He has been at the helm of the company since leaving high school, demonstrating his strong leadership skills and business acumen.
Colin’s expertise lies in various aspects of landscaping, including lawn care, interlocking, sod installation, and commercial maintenance. His hands-on approach and dedication to the craft have been instrumental in building Riverwood Landscape into a reputable brand.
One of his most notable achievements is the creation of a successful landscape franchise that services multiple locations. This accomplishment underscores his strategic thinking and ability to scale operations effectively.
Colin has also had the privilege of working with Guelph Hospital for landscaping and maintenance, a testament to the trust and reliability that his company has earned over the years.
His professional mission is to offer the best services and experiences for customers, a goal that he tirelessly pursues. Colin’s commitment to excellence and customer satisfaction continues to drive the growth and success of Riverwood Landscape.