Charging your garden solar lights may seem straightforward, but what do you do when the sun refuses to play ball? With a few clever tricks, you can keep your lights glowing even on the cloudiest days. Whether it’s winter gloom or a bout of bad weather, there’s no need to resign yourself to a dimly lit garden.
You’ll discover how to harness even the weakest rays with the right placement and battery choice. And for those days when the sun is on a break, learn how to use indoor light sources to keep your solar lights charged and ready. Stick around to illuminate the path to a bright, sparkling garden, no matter the weather.
Benefits of Solar Garden Lights
Energy Savings
Your decision to choose solar garden lights directly translates into Energy Savings. Unlike traditional lighting that consumes electricity from the grid, solar lights harness the sun’s power during the day and store it in efficient batteries for use at night. By converting natural sunlight into electrical energy, you’re eliminating the need for costly electrical energy to light up your garden.
- Zero energy costs for operation
- Ability to charge even on cloudy days with efficient solar cells
- Savings on wiring and electrical installation since solar lights are self-contained
A well-placed set of solar garden lights can help cut down your energy bill significantly. As solar technology advances, expect even greater efficiency and savings.
Environmentally Friendly
Opting for solar garden lights is a step towards a greener future. These lights use renewable energy from the sun, reducing reliance on fossil fuels, which are a major contributor to greenhouse gas emissions and climate change. With solar lighting, your garden becomes a beacon of sustainability.
- Reduction in carbon footprint with the use of clean energy
- No harmful substances like mercury, found in some conventional bulbs
- Promoting biodiversity in your garden by ensuring a pollution-free lighting solution
By using solar garden lights, you’re contributing to environmental conservation efforts and helping to promote a sustainable lifestyle.
Low Maintenance
The convenience of solar garden lights is unmatched when it comes to maintenance. Built to be durable and weather-resistant, these lights require little to no attention once installed. Battery technology has evolved, and many solar lights now use long-lasting components that offer years of hassle-free operation.
- Rarely need to replace bulbs due to the longevity of LED technology
- Batteries typically last for several years before needing a replacement
- Easy to clean with just soap and water; no special treatment required
Enjoy the glow of your solar garden lights without the worry of upkeep, allowing you more time to appreciate the evening ambience of your outdoor space.
Understanding Rechargeable Batteries
Types of Rechargeable Batteries
Rechargeable batteries are essential for the seamless operation of your solar garden lights. Nickel Metal Hydride (NiMH) batteries are commonly used due to their efficiency in recharging. These batteries stand out for their longevity and ability to sustain the daily charge and discharge cycles. There are other types of rechargeable batteries, such as Nickel-Cadmium (NiCd) and Lithium-Ion (Li-ion), each with its unique advantages. NiCDs are known for their robustness in extreme temperatures, while Li-ion batteries boast a high energy density, providing longer lighting duration.
Battery Capacity and Voltage
Understanding battery capacity and voltage is key to optimizing your solar lights’ performance. Battery capacity, measured in milliampere-hours (mAh), indicates how much charge a battery can hold. Typically, NiMH rechargeable batteries for solar lights have capacities ranging from 800 to 2200mAh. Voltage, on the other hand, signifies the electrical potential of the battery. Most solar lights require a 1.2V NiMH battery.
| Battery Type | Capacity (mAh) | Voltage (V) |
|---|---|---|
| NiMH | 800 – 2200 | 1.2 |
| NiCd | 600 – 1000 | 1.2 |
| Li-ion | 1000 – 3000 | 3.7 |
It’s crucial to match the voltage and capacity to your solar light’s requirements to ensure efficient energy storage and dispensation. Remember that higher capacity translates to longer run times, and choosing the right voltage is vital for protecting your solar lights’ circuitry.

Steps to Charge Solar Garden Lights
Step 1: Check the Weather
Before you start, it’s crucial to assess the weather conditions. Solar garden lights rely on sunlight to charge, so you’ll need a clear, sunny day. You won’t have much success during cloudy or rainy days as these conditions significantly reduce solar light efficiency.
Step 2: Position the Solar Panel
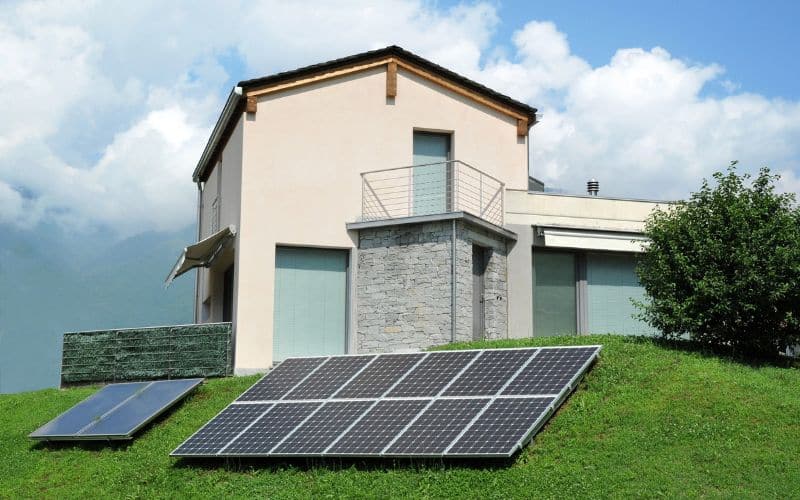
You need to ensure that your solar panels are positioned optimally to capture sunlight. Ideally, they should face True South in the Northern Hemisphere to maximise exposure. During installation, consider seasonal changes and obstacles like trees or buildings that might cast shadows and limit charging capabilities.
Step 3: Clean the Solar Panel
Routine cleaning significantly impacts the efficiency of solar panels. Wipe the panel surface with a soft, damp cloth to remove any dust or debris. Clean panels absorb sunlight better, which translates to more energy and longer illumination times for your garden lights.
Step 4: Turn Off the Lights
While it may seem counterintuitive, turn off your solar garden lights during the day. This step ensures all the solar energy collected goes into recharging the batteries rather than powering the lights, leading to more efficient charging.
Step 5: Connect the Solar Panel to the Lights
Most solar garden lights have built-in panels, but if yours are separate, ensure a secure connection. Properly connected panels are essential for effective energy transfer from the sun to the lights’ batteries.
Step 6: Place the Lights in Direct Sunlight
Place your solar garden lights in a location with unobstructed access to direct sunlight. This spot should receive sunlight for at least 6-8 hours. In winter, when days are shorter, consider a spot that remains sunlit for the majority of the day.
Step 7: Monitor the Charging Process
Finally, keep an eye on your lights throughout the charging process. Check to make sure they’re still receiving direct sunlight and haven’t been shaded by any new obstructions. After a full day’s charge, your solar lights should be ready to illuminate your garden by evening.

Tips for Maximizing Solar Garden Light Charging
Optimal Placement of Solar Panel
To get the most from your solar garden lights, positioning is crucial. You’ll want to ensure they’re placed in a spot with 6-8 hours of direct sunlight per day. Factors like geographic location impact solar panel output considerably. For those in the Northern Hemisphere, aim to position your panels south-facing to capture the most sunlight as it traverses the sky from east to west. Adjusting your solar panels’ tilt angle significantly enhances their absorption capacity – 30 degrees in summer and around 45 degrees during the shorter days of winter are ideal for the United States.
Regular Maintenance of Solar Panel
Clean solar panels are efficient ones. Even during cloudy weather, solar panels can accumulate energy, but any layer of dust or debris will hinder this process. A straightforward clean with water and a microfiber cloth every few months maintains their functionality. Solar panel cleaning solutions can be employed for a deeper clean but it’s essential to avoid harsh chemicals that could damage the panel’s surface.
Use of Reflective Surfaces
Reflective surfaces like mirrors can be a clever trick to amplify the charging capability of your solar lights. They redirect additional sunlight towards your solar panels, which is particularly useful during periods when sunlight is not as intense or direct. This technique is most effective when the reflective surfaces are positioned to catch the angles of sunlight that might otherwise be missed and directing it back onto the panel.
Avoid Shading
Solar panel efficiency plummets in the shade. So keep an eye out for trees, walls, or nearby structures that may cast shadows and reposition your lights if necessary. Trimming overhanging branches can make a considerable difference. Also, be mindful of installing lights too close to artificial bright lights which can cause a false dusk/dawn effect, resulting in poor charging or your lights not turning on.
Conclusion
Charging your solar garden lights effectively hinges on your attention to their placement and upkeep. By ensuring they’re positioned to catch maximum sunlight, kept clean, and strategically placed near reflective surfaces, you’ll boost their ability to soak up the sun’s energy. Steer clear of shade and artificial light interference to prevent charging hiccups. Adhering to these straightforward strategies will help maintain your lights’ glow, making your garden a beacon of sustainability and charm night after night.
Colin Macmillan is a seasoned entrepreneur and the CEO of Riverwood Landscape, a leading landscaping company based in Canada. He has been at the helm of the company since leaving high school, demonstrating his strong leadership skills and business acumen.
Colin’s expertise lies in various aspects of landscaping, including lawn care, interlocking, sod installation, and commercial maintenance. His hands-on approach and dedication to the craft have been instrumental in building Riverwood Landscape into a reputable brand.
One of his most notable achievements is the creation of a successful landscape franchise that services multiple locations. This accomplishment underscores his strategic thinking and ability to scale operations effectively.
Colin has also had the privilege of working with Guelph Hospital for landscaping and maintenance, a testament to the trust and reliability that his company has earned over the years.
His professional mission is to offer the best services and experiences for customers, a goal that he tirelessly pursues. Colin’s commitment to excellence and customer satisfaction continues to drive the growth and success of Riverwood Landscape.


