About Brussels Sprouts Plants
The edible sprouts grow like globular buds along the side of long, thick stems about 30 to 36 inches tall. The bright green cabbage-like sprouts are 1 to 2 inches in diameter, and each stalk can yield 2.5 to 3.1 lb. The sprouts are often composed of compacted leaves.
Because Brussels sprouts require a fairly long growing season, many recommend growing them with a fall crop in consideration. They are among the few crops frequently picked after the snow has fallen. If you’re in a temperate climate region that doesn’t have hot summers, you can produce a spring crop of Brussels sprouts.
Brussels Sprouts Varieties
- Churchill – An early maturing sprout, producing mild green, smooth, large bulbs
- Diablo – A heavy cropping brussels sprout with solid, medium-sized heads
- Falstaff – A red/purple sprout with milder, nuttier flavour
- Jade Cross – A high-yield compact plant of deep green, flavorful round sprouts
- Long Island Improved – A dwarf variety heirloom that produces a sweeter tone after a light frost.
- Oliver – The earliest variety can be planted as late as early summer and matures remarkably early.
Are Brussels Sprouts Easy To Grow?

When To Plant Brussels Sprouts?
The above statement suggests that seedlings are commonly sowed in the ground in June or started from seed indoors in May in most climates. If you’re in a place with a warm climate, you’ll want to plant seeds mid-summer and have a fall harvest or early winter harvest.
Most gardeners suggest starting seeds indoors because this offers seedlings an upper hand and helps safeguard them from the heat of summer and pests. If you intend to plant outdoors, directly in the ground, sow seeds a few weeks, about 20 days, earlier than if you’re establishing them indoors.
How To Plant Brussels Sprouts?
Grow Brussel Sprouts Indoors
Fill seed flats, seedling trays, or pots with a premium seed starting mix and sow seeds a quarter of an inch deep inside individual 3-inch seedling pots. Plant two seeds for every pot. Spread another layer of seed starting mix on top of them and compress them, so they’re firmly packed. Moisten the top layer using a spray mister. Cover plants with clear plastic to hold the moisture so the soil won’t need watering until after sprouting. Place the pot in a sunny spot or if you have strong enough grow lights.
Brussels sprouts seeds germinate at an optimal temperature between 45 and 85 degrees Fahrenheit. They will sprout in 7-12 days and remove any covers after the seeds germinate. Keep the soil moist and nourish plants with diluted fish emulsion solution or liquid kelp, repeating every two weeks.
Transplant seedlings into the garden when they are 5-7 inches tall and have grown 2-4 strong leaves. Move Brussel sprouts to a sheltered area outdoors for one week before transplanting to “harden off” and avoid transplant shock. The wind and sun can have a drying effect, ultimately stressing or harming the plants.
Grow Brussels Sprouts In A Garden

Brussels sprouts prefer to be grown in slightly acidic (pH 6.5-7), well-cultivated, fertile soil. They must receive about 1-2 inches of water each week.
If sowing directly in the garden, plant seedlings about ½ inch deep, 2-3 inches apart, and space rows (or in raised beds) 3-4 inches apart. Closely monitor your new seedlings, more or less, for one week, particularly on blistering summer days.
If cold winters below 32°F make headway and you’re worried that it might last longer and damage the plants, cover the seedlings with something large enough to cover the entire plant.
Water thoroughly after planting, then apply 2-3 inches of mulch around every plant to slow soil moisture evaporation and suppress the growth of weeds. Some shade during the hottest part of the mid-day sun during the first few weeks in a garden is desired.
As time goes on, thin seedlings to 18 to 24 inches apart once they grow 3-4 leaves or reach roughly 6 inches tall. Feed with a nitrogen-rich product after thinning. Do this every 3 to 4 weeks.
It is not required to tie up Brussels sprouts at the time of planting. But they are sometimes needed to avoid tipping over as the plants grow and get heavy. Stake each plant individually with a thick bamboo stake, a wooden stake, and a loose piece of twine. Or you can mound some soil at the base.
What Can I Plant Near Brussels Sprouts?
Avoid strawberry plants since strawberries can stunt their growth. Tomatoes, eggplants, potatoes, and other nightshade members extract necessary nutrients from Brussels sprouts.
How To Care For Brussels Sprouts?
Water Requirements
Mulches And Covers

Fertilizer Application
Brussels sprouts also require more boron than other plants. Scarred and corky spots on petioles and stems and brittle foliage are a few signs of boron deficiency. When this happens, mix 1 tablespoon of borax in 5 quarts of water and sprinkle it evenly over 50 square feet of bed. Never apply more than 1 tablespoon of borax, as too much leads to more problems.
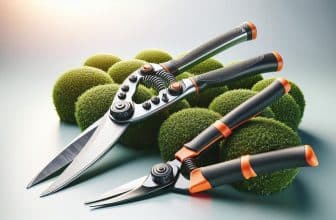
Pruning
How To Harvest Brussels Sprouts?
Harvest sprouts when the lower nodes are 1 to 2 inches in diameter. Gather them before they grow overlarge, and leaves begin opening.
Simply twist the little balls to remove the Brussels sprouts from the stalk. Also, ensure you harvest brussels sprouts from the bottom of the stem, leaving the smaller nodes near the top to support growth.
After a moderate frost, you can also take the entire stalk and roots and remove leaves first and then individual sprouts. Keep harvesting because snow doesn’t need to halt production, and it is also likely to have a late winter harvest, based on your weather. Then hang dry the stalk upside down in a garage or shed.
After harvesting sprouts, the second yield might start to develop at the base of the stalk. You may also like to reap the leaves, which are an excellent replacement for cabbage.
Store stalks (without roots) or loose sprouts for at least a week in a plastic bag in your refrigerator’s crisper. Discard any rotting or yellow leaves. And please don’t wash them until you’re ready to prepare them.
You can stretch the season long by stacking straw mulch around the plants as high as possible and using raw covers.
Problems Of Brussel Sprouts
Common Pests
Cabbage Worms And Loopers
Cabbage Aphids

Cabbage Root Fly
Place brassica discs or collars around stalks to keep the female fly from laying eggs on the soil surface. Or grow sprouts under the cover of an insect-proof mesh.
Leaf Miners
Thrips
Common Diseases
Black Rot
Alternaria Leaf Spot
Powdery Mildew

Clubroot
Plant only certified seed and rotate Brussels sprouts and other cabbage-family plants away from infested beds for seven years.
Enjoy The Fruit Of Your Labour
Colin Macmillan is a seasoned entrepreneur and the CEO of Riverwood Landscape, a leading landscaping company based in Canada. He has been at the helm of the company since leaving high school, demonstrating his strong leadership skills and business acumen.
Colin’s expertise lies in various aspects of landscaping, including lawn care, interlocking, sod installation, and commercial maintenance. His hands-on approach and dedication to the craft have been instrumental in building Riverwood Landscape into a reputable brand.
One of his most notable achievements is the creation of a successful landscape franchise that services multiple locations. This accomplishment underscores his strategic thinking and ability to scale operations effectively.
Colin has also had the privilege of working with Guelph Hospital for landscaping and maintenance, a testament to the trust and reliability that his company has earned over the years.
His professional mission is to offer the best services and experiences for customers, a goal that he tirelessly pursues. Colin’s commitment to excellence and customer satisfaction continues to drive the growth and success of Riverwood Landscape.