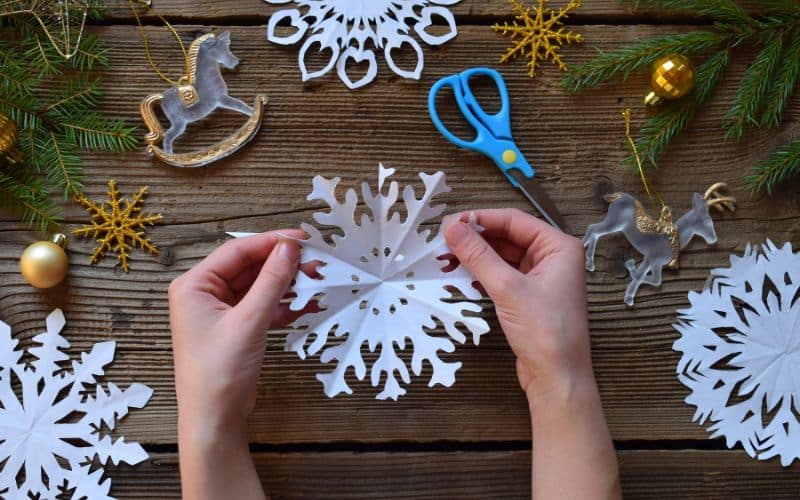
Looking to add a dash of winter magic to your front porch or yard? You’re in the right place! In this article, we’ll guide you through the steps of creating your very own DIY outdoor snowflake decorations.
You may think creating decorations is a complex task, but we assure you, it’s not. With some simple materials like white plastic hangers and a bit of creativity, you’ll have stunning snowflakes adorning your outdoor space in no time.
Materials Needed
Creating your own DIY outdoor snowflake decorations doesn’t require threatening your pocketbook with expensive materials. All you need might already be lurking around your household. Let’s delve into the necessary items you’ll require.
Paper
Your DIY outdoor snowflake decoration journey starts with paper. It’s the canvas for your creative ideas. For the snowflakes, use paper that’s both sturdy and easy to cut, such as poster paper or card stock. You might want to consider using wrapping paper or other lighter paper since they are easier to cut but bear in mind that these snowflakes can be more fragile in the end.
Scissors
A pair of quality scissors is as vital to creating snowflakes as a quill is to an old-time poet. Quick snips with your trusty scissors will bring your paper snowflakes to life. Such tool will help in cutting precise angles necessary to produce a six-pronged snowflake, which is an essential first step no matter the size you wish your snowflake to be.
Glue
The next item in your toolset is craft glue. A bottle with a fine-tipped applicator will give you an advantage. It’s used to draw your snowflake’s lines on your preferred material – be it your cut-out paper or a sheer organza tablecloth. After creating the lines, sprinkle them with glitter to add that magic Christmas sparkle.
Glitter
A snowflake isn’t truly complete without a shimmer of silver. Hence, the glitter. After tracing the outlines in craft glue, sprinkle over your design with a wave of silver glitter. The glitter sticks onto the glue as it dries, allowing you to create shiny snowflakes that catch the winter sunlight, and create a magical glistening effect in your yard or on your porch.
String or Ribbon
With your snowflake cut, glued and glittered, your last creative task is to display it. For the hanging snowflakes, you’ll need some string or ribbon. Simply thread it through a hole in your completed snowflake, and you’re ready to hang your creation where it can sprinkle your surroundings with some winter cheer. You can string them on long garlands, hang some from single strings, or even create enchanting garlands of them.
The beauty of DIY outdoor snowflake decorations is that they’re able to beautify your space on a budget. Creating these enchanting snowflakes allows you to infuse your sentiments, your creativity, and your joy into your festive space. So, get your materials ready and let’s add a personal touch to this festive season.
Choosing a Snowflake Design
Snowflakes are unique, each carrying its own distinct beauty. But when it comes to creating them for decorations, it’s fine to choose a pattern. Remember, this isn’t about imitation. It’s about bringing the magic of winter into your home. There are dozens of designs to choose from, ranging from the basic geometric patterns to the intricately designed ones.
Simple Geometric Snowflakes
Your first experience with snowflake creation possibly began in school, using a simple piece of paper. Although basic, these creations carry nostalgia with them and can become the framework for more complex designs. Conventional cutouts can create an enchanting flurry for your decorations.
Remember those paper snowflakes you made in school? Maybe your children still bring them home every year. After mastering the simple paper snowflake, there are other different mediums you can explore.
You can crochet or knit them using leftover knitting materials, draw them in chalk or cut them from heavy-duty stock that can be transformed into glittered ornaments. Make an array of snowflakes in varying sizes, hang them in a window at different heights, or encode them into a gift bow.
For a bolder and substantial touch, you can try dimensional snowflakes. Unlike flat snowflake motifs, these stand on their own and represent multidimensional decorations that look breathtaking from any angle. Acrylic fibers and LED lights contribute to their visual charisma. Hang them from tree branches, set them upright on the ground, or place them on a table top.
Intricate Snowflake Patterns
Once you’ve got the hang of it, you can level up to intricate designs weaving magic into your holiday decor. This is where you can truly get creative and bring variety into the frozen tableau.
Crocheted and tatted snowflakes can add a vintage touch, reminiscent of the lace doilies that might have been a part of your grandma’s home decor. These are more ambitious projects, but they’re rewarding and create beautiful pieces to adorn your Christmas tree, mantelpiece, or even your sweater’s zipper pull.
Such detailed patterns might take longer to make but have an appeal that’s well worth it. Despite their complexity, you can make a single intricate flake in under an hour.
Blend these intricate designs with simple geometric ones to create a perfect balance. By combining designs, you add varying degrees of depth and texture to your decorations.
The process of creating each design brings its own sense of fulfilment. In essence, you’re breathing life into each snowflake, creating a mesmerising winter landscape within your own home. Suspend a bunch from the ceiling and transform your space into a winter wonderland.

Making the Snowflakes
Snowflakes – nature’s very own works of art. A winter must-have, creating DIY snowflake decorations are a fun and effective way to bring that crisp, frosty feel into your home.
Folding the Paper
Before we embark on any forms of cutting, your first step is to learn the ins and outs of shaping that perfect paper snowflake. Unlike real snowflakes, there are ways that crafters can create uniform flakes once they’ve mastered an easy-to-follow technique. This technique involves folding your paper with precision to create that signature six-pronged snowflake pattern. Here are your steps:
Start with a square sheet of paper.
Fold it in half to form a triangle.
Fold it again to form a smaller triangle.
Lastly, fold this smaller triangle in thirds, moving the corners inward to overlap one another.
Cutting the Paper
Now comes the moment of truth – getting those scissors out and snipping away to create your unique snowflake. Here are some tips:
Cut out various shapes along the edges of the paper. Remember, it’s your snowflake – you’re free to design it as you please!
For the less crafting confident or those wishing to ensure their snowflakes have a uniform look, consider using a template or even a snowflake design tool online.
Adding Glitter
Once your snowflake is cut and ready, now it’s time to add some shimmer! Adding glitter will make your snowflake decorations pop, catching light and adding sparkle to any room.
Apply a layer of craft glue or Mod Podge to your snowflake.
While the glue is still wet, sprinkle on some glitter.
Let them dry and shake off any excess glitter.
If you’re feeling adventurous, vary the colour or style of glitter used for a more dynamic effect.
Always remember to protect your workspace from the inevitable glitter shower!
Attaching String or Ribbon
For the final step to your DIY snowflake creation, you’ll want to attach a string or ribbon. But before you make any hasty decisions, consider where these homemade decorations will be hanging:
For snowflakes that will be clinging to a Christmas tree, use thread or fishing line for a floating effect.
For snowflakes bound for the mantelpiece or railing, consider using a ribbon that matches or complements your existing decor.
If you’re creating a paper snowflake garland, remember that simple twine can look rustic and elegant.
Once you’ve decided:
Use a hole punch to make a small hole at one corner of the snowflake.
Thread your choice of ribbon or string through the hole and secure with a knot.
Your DIY snowflake decoration is created, sparkled, and ready to hang! Above all, just remember – this is about fun and feeling festive. From cutting to hanging, each snowflake decoration will invite a slice of winter right into your home.

Hanging the Snowflakes
If there’s something that screams winter and the holidays, it’s snowflakes. So why not add a handful to your holiday decorations this year? In this section, we’ll guide you through the process of choosing the right spots for your snowflakes and suitable means to hang them.
Finding the Perfect Spot
Your snowflake decorations aren’t just confined to your Christmas tree, consider all corners of your outdoor spaces that could do with a bit of wintery sparkle. Wondering where you might place your snowflakes? Here are a few ideas:
Across the porch and above the front door: Hang snowflake lights for Santa to find your house easily this year
On the roof, fence, or front gate: They’re bound to look beautiful!
Wrap tree trunks, columns, and railings with snowflake string lights
Lining a mantel with snowflake lights.
Above the fireplace: A lighted snowflake motif would be a stunner!
Illuminate your winter wedding with the gorgeous glow of snowflake lights
Interspersing these areas with your snowflake decorations will create a harmonious winter wonderland effect across your whole property.
Using Hooks or Adhesive Strips
Now it’s time to hang your decorations! Snowflakes often come with built-in rings or open spots within the frame for you to utilise. S-hooks or a simple rope looped through the ring or frame is a good go-to in all hanging scenarios.
Alternatively, opt for the DIY route and create your very own hanger snowflakes with easily available household items. Follow these steps:
Arrange 8 hangers in a circle with their flat bottoms touching each other and their hooks touching the neighbouring hanger’s.
Secure the intersections with zip ties, don’t tighten too much until you ensure everything is in position.
Add a second layer of hangers shifted at a 45-degree angle so they fall in between the spots of the existing hangers. Repeat the zip tying process.
Attach lights if applicable, again using zip ties.
If you are pondering attaching your snowflakes to a window or a wall, nails or hooks make for great mounting associates. For a less damaging option, especially on walls and windows, go for temporary adhesive clips or hooks. These light-duty fasteners do their job really well without leaving any trace behind once the holidays are over. Do note that for larger snowflakes, you might need to use more than one adhesive hook to bear its weight, but they’re sure nifty for lighter decorations.
Conclusion
You’ve now got the know-how to create your very own DIY outdoor snowflake decorations. It’s all about folding and cutting the paper into a unique six-pronged snowflake pattern. Don’t forget that dash of glitter to add some sparkle. The fun doesn’t stop there! You’ve got a ton of options when it comes to hanging your creations. Whether it’s across the porch, on the roof or fence, around tree trunks, or lining a mantel, you decide. And with hooks, adhesive strips, nails, or even window mounts at your disposal, there’s no limit to where you can display your snowflakes. Remember, it’s not just about the end result, but also the joy of the creative process. So go ahead, have fun and let your creativity shine this winter.


