Retaining walls have long been a staple in landscaping, offering both functional and aesthetic benefits. Whether you’re a homeowner looking to enhance your garden or a professional landscaper, understanding the intricacies of working with retaining wall blocks is crucial. In this guide, we’ll delve deep into the world of blocks, walls, and the tools and techniques needed to master them.
Retaining Walls and Landscape Blocks
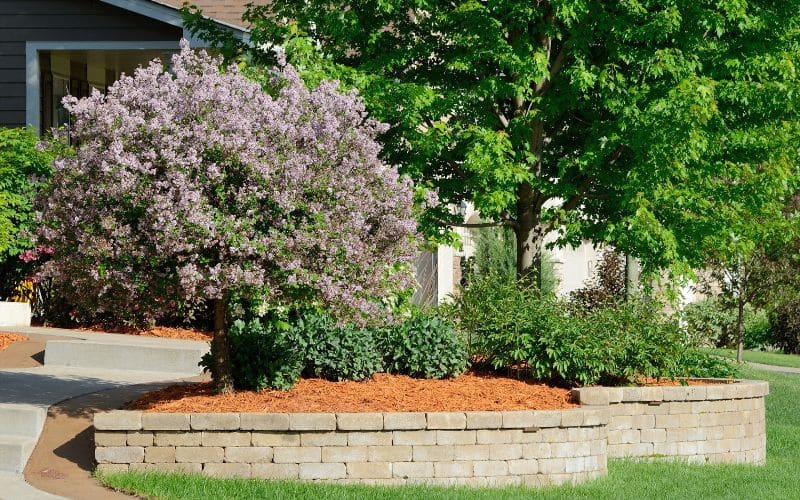
At first glance, a retaining wall might seem like a simple structure, merely a collection of blocks meticulously arranged. However, delve a bit deeper, and you’ll discover it’s a masterpiece of landscape design. These walls do more than just hold back soil; they sculpt our gardens, creating elegant terraces and multi-level wonders. And the materials chosen – whether it’s the rustic charm of stone, the robustness of concrete, or the classic allure of brick – play a pivotal role in determining both the wall’s longevity and its aesthetic appeal.
The Concrete Advantage: Why Opt for Concrete Blocks?
When it comes to building retaining walls, concrete blocks stand out as a top contender. Their popularity isn’t just a trend; it’s backed by tangible benefits. These blocks boast impressive durability, ensuring your wall stands the test of time. But it’s not just about strength; it’s also about consistency. Unlike natural stones, which come with their unique quirks in size and shape, concrete blocks promise uniformity. This consistency simplifies the construction process, ensuring a smoother build. And when it’s time to shape or resize? With the right tools in hand, cutting through concrete feels almost effortless.
What Tools Are Essential for Cutting and Installing?
The success of your retaining wall project hinges on the tools you wield. For those intricate cuts, especially with stone, a chisel becomes an indispensable ally. It allows for precision, ensuring each piece fits just right. But when dealing with concrete blocks, a power saw equipped with a masonry blade becomes the hero, delivering clean, straight cuts every time. However, amidst all the cutting and crafting, never sideline safety. Equip yourself with essential protective gear, such as safety goggles and a dust mask. After all, a successful project is one where both the wall and its creator remain unscathed.

How to Properly Use a Chisel for Landscape Blocks?
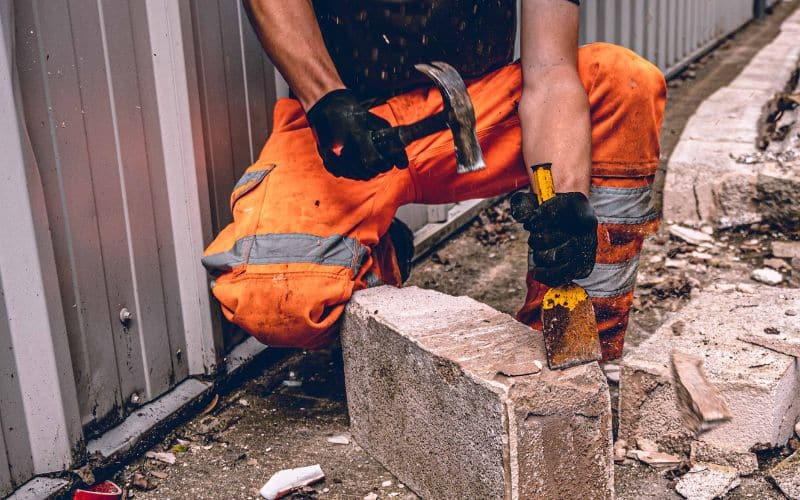
The chisel, with its sharp edge and sturdy handle, might appear intimidating at first. But, with a touch of technique and a dash of confidence, it becomes a landscaper’s best friend. To harness its potential, start by marking the exact spot on the block you wish to split. Position your chisel confidently on this mark. Then, with a hammer in hand, deliver gentle yet firm taps. You’ll find that after just a few strikes, the block yields, splitting cleanly along the marked line. It’s an art, and with practice, you’ll be chiseling like a seasoned craftsman.
Power Saw or Circular Saw: Which is Better for Cutting Concrete Blocks?
In the world of saws, both the power saw and the circular saw have carved out their niches. The power saw, armed with a masonry blade, slices through concrete blocks as if they were butter. It’s efficient, powerful, and gets the job done swiftly. But then enters the circular saw, known for its finesse. It shines when precision is the name of the game, making those detailed cuts with unparalleled accuracy. If you’re ever in doubt or looking to refine your skills, the digital realm is teeming with YouTube tutorials, guiding you step by step. So, whether you’re Team Power Saw or Team Circular Saw, rest assured, there’s a tool out there that’s just right for your project.
The Art of Cutting Stone Retaining Walls
Stone, with its raw beauty and timeless appeal, is a coveted choice for retaining walls. But shaping this natural marvel demands a blend of patience, skill, and the right instruments. The chisel emerges as the artist’s brush in this scenario, enabling craftsmen to achieve those meticulous breaks and contours. But as you dance with the stone, always be mindful of the rhythm of safety. Don protective gear to shield yourself from the occasional rebellious specks of dust and the stone’s sharp whispers.
How to Cap Your Retaining Wall for a Finished Look?
Every retaining wall, no matter how robust or intricately designed, deserves a grand finale. That’s where capping comes into play. Think of it as the cherry on top of your landscaping sundae, providing both aesthetic charm and functional protection.
Capping serves multiple purposes:
- Aesthetic Appeal: It offers a smooth, finished look, transforming your wall from a mere functional structure to a landscaping feature that catches the eye.
- Protection: Caps shield the underlying blocks from direct exposure to elements like rain and snow, thereby prolonging the wall’s lifespan.
- Safety: A well-placed cap can prevent sharp edges, making the area safer for passersby, especially children.
When capping, material choice is crucial. Whether you’re gravitating towards the natural elegance of stone, the timeless allure of brick, or the steadfast durability of concrete blocks, the process demands precision:
- Preparation: Clean the top layer of your wall, ensuring it’s free from dust and debris.
- Alignment: Lay out the caps first without securing them, ensuring they fit well and are aligned perfectly.
- Adhesion: Use a strong adhesive or mortar suitable for your cap material. Apply it evenly, then place each cap, pressing down firmly.
- Finishing Touches: Ensure there are no gaps between the caps. If there’s any overhang, it should be consistent for a uniform look.
Common Mistakes to Avoid When Installing a Wall with Landscape
Every homeowner embarking on a landscape wall project should tread with caution, being wary of the common missteps that can mar the final outcome. A prevalent oversight is neglecting proper drainage solutions, which can result in water accumulating behind the wall, compromising its integrity. Additionally, wielding the wrong tools for cutting can lead to blocks that are more jagged jigsaw than perfect puzzle piece. Knowledge is power, and being aware of these pitfalls can steer you clear of them.
Kommentare and Feedback from Professional Landscapers
Seasoned landscapers often echo a singular mantra: preparation is paramount. Before you make that first cut or lay that inaugural block, ensure your arsenal is equipped with every tool and material you’ll need. And while enthusiasm is commendable, safety should never take a backseat. Don the right protective gear and always be mindful of your surroundings.
AB Techniques: Advanced Tips for Cement Retaining Walls
For the ambitious homeowners with an eye for the extraordinary, there’s always room to elevate your retaining wall endeavors. Venture beyond the conventional and consider diversifying your block materials. Perhaps a blend of textures? Or for the artistically inclined, infuse design intricacies like sinuous curves or intricate patterns. Remember, a retaining wall can be as much a functional marvel as it is a canvas for your creativity.
Conclusion: The Future of Landscape and Retaining Wall Innovations
The world of landscape and retaining walls is ever-evolving. With advancements in tool technology and design techniques, the possibilities are endless. Whether you’re a seasoned professional or a DIY homeowner, there’s always something new to learn and explore.


