When it comes to maintaining your home, there’s no detail too small to consider. One such detail that often gets overlooked is outdoor outlets. These outlets, exposed to the elements such as rain and salty air, require protective covers to prevent damage. Whether you use them frequently or not, any outdoor outlet should have a cover. An uncovered outlet can pose a serious risk, especially when it gets wet, leading to potential electric shocks that can cause severe injuries or even be fatal.
The importance of protecting your outdoor outlets cannot be overstated. If even a single outlet is left uncovered, it can decrease your home’s safety, particularly in the event of a natural disaster. Moreover, an unprotected outlet can become a fire hazard.
How to Cover an Outside Outlet
Outdoor outlets are vulnerable. They face the elements day in, day out. Rain, salty air, or even the water stream from your garden hose can cause them harm. And if you’re aware that water and electricity are a dreadful mix, you’ll appreciate the importance of giving your outlets optimal protection. An unprotected outlet can turn into a deadly shock hazard or even spark a fire. Here’s what you can do:
Before you begin, ensure the power is off to prevent any nasty shocks.
Inspect your outdoor outlets. Are they vertical or horizontal? Different styles of outlet covers are available in the market tailored to both orientations. Remember, it’s vital to choose a cover that conforms to your outlet’s setup.
Select a GFCI protected cover. Let’s clarify what that means. GFCI – Ground Fault Circuit Interrupter – is a safety mechanism that trips electrical supply when it detects a ground fault. It’s a life-saver when it comes to preventing electric shocks.
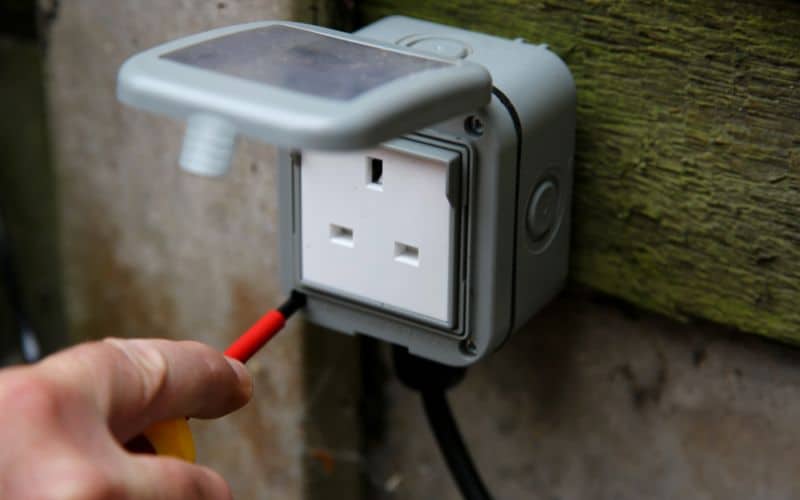
Got a stubborn cover? Don’t stress! Check for any visible screws keeping it in place. Clean any debris wedged around the edges. It often makes all the difference. And if that doesn’t help, a flathead screwdriver can gently pry it open.
Is your outlet close to the ground? You might want to consider lowering its location. It’s not only easier to access, but you can also cleverly hide it behind the shrubs. Simply tilt the drill bit downward and drill a 3/4-in. hole in the siding above the desired spot.
Remember, safety should be your prime concern always. Covering your outside outlets is more than mere home maintenance. It’s about protecting your home, your loved ones, and yourself.
Factors to Consider
It’s vital to evaluate several variables in your quest to successfully cover an outside outlet. Stay focused on the following aspects:
Weatherproofing
Paying close attention to weatherproofing is a precautionary step you can’t ignore. When it comes to outdoor outlets, you’re dealing with an environment that often exposes them to harsh elements. Water, dirt and salty air are all harmful contaminants that could wreak havoc on unprotected electrical systems.
Remember, coupling water and electricity is the perfect recipe for disaster. The right outlet cover should be suitably weather-resistant and include a gasket, or seal, to keep these dangers at bay.
Go the extra mile by ensuring your cover can easily lodge an electrical cord while in use. Moreover, constant and thorough inspection of your outlet cover can’t be overemphasized. Careful inspection prior to usage can help prevent accidents and damage.
For outlets that remain engaged, say for example, during a festive period, consider a “while-in-use” cover. These covers boast a design that allows for continued protection even when the outlet’s in use.
Aesthetics
While safety is vital, don’t neglect aesthetics! You’ve landscaped a beautiful garden, or decked out your patio with stylish furniture, you want your outlet covers to match, right?
Absolutely.
Selecting an outlet cover design that aligns with your outdoor decor may seem daunting, but it’s achievable. Remember, it’s not an invitation to risk safety for the sake of style. Stick to traditional materials like silicon and heavy-duty plastic. They’ll serve the purpose of guarding against electrical surges and fitting into your space effortlessly.
Contemplating designing your own, unique cover? It’s an understandable lure for the thrifty or artsy folks. While it might be visually interesting, this approach poses a risk. Calling in a licensed electrician is a smarter move. They possess the knowledge and expertise to safely and correctly install the cover.
After all, you wouldn’t want your creative outlet cover to become your safety downfall, would you?

Types of Outlet Covers
Your outdoor electrical outlets need robust protection from the elements. To ensure they remain safe and effective, you have multiple types of outlet covers to choose from. Each outlet cover type has its unique characteristics, all designed with safety in mind. Let’s delve into the different types you can consider.
Plastic Outlet Covers
Plastic outlet covers are a common choice for their resistance to environmental factors such as rain, dirt, and salty air. They’re often made of heavy-duty plastic or silicon, both materials having excellent insulating properties against electrical surges. The aesthetic appeal isn’t sacrificed either – you’ll find these covers in various colours and styles to complement your outdoor decor. However, it’s important to remember to check these covers regularly for any cracks, weather damage or leaking seals as they can compromise the safety of your outdoor outlets.
Metal Outlet Covers
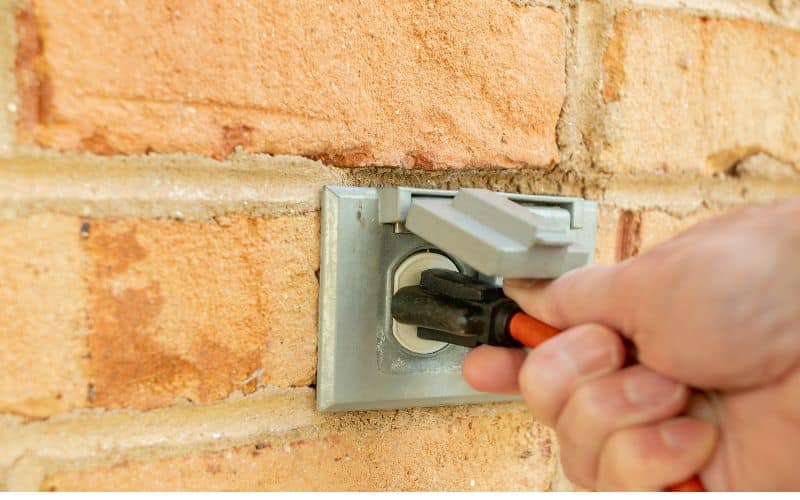
Metal outlet covers offer a more sturdy and durable alternative to plastic ones. Notably, some professionals prefer metal covers because they can potentially save costly callbacks to warranty a broken plastic cover. While these may be a bit pricier, the investment pays off in longevity and reduced maintenance. Again, placement is key, try to position the outlet in discreet or sheltered locations rather than in the middle of a wall exposed to elements.
In-Use Outlet Covers
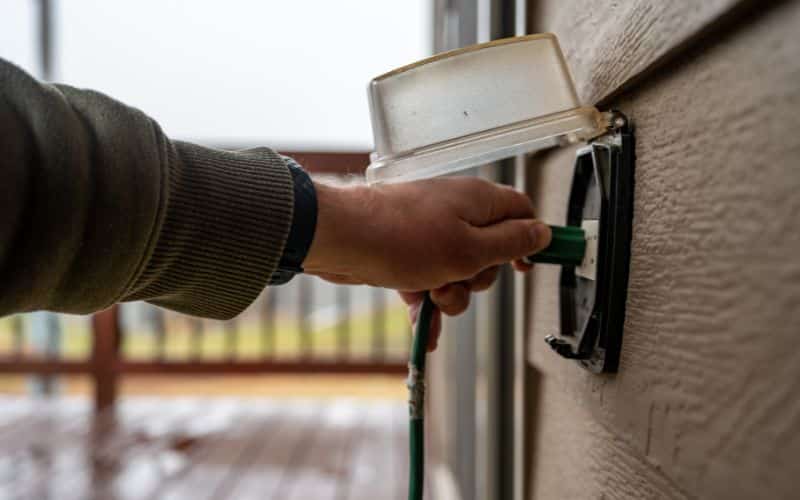
In-use covers, also known as bubble covers or outlet box hoods, provide protection for your outdoor outlets even when they’re in use. These usually come with a door that can close around electrical cords. Typically, they feature a clear plastic lid that folds down, sealing the electrical cords against rain or snow. Another advantage of in-use covers is their versatility – they are designed to fit outdoor outlets installed both horizontally and vertically.
Installation Process
Understanding the right approach to cover an outdoor electrical outlet involves multiple steps. Each one needs special attention for a perfectly safe and error-free installation. Let’s break down the process into easy-to-follow steps under the following subheadings.
Turn Off the Power
It is key to follow safety protocol when handling electrical installations. Turning off the power supply should always be your first step when working with outdoor electrical outlets. To do so, press the reset and test buttons on the outlet together. Ensure to double-check that the power is off using a voltage tester. In case of a flood or other issues compromising your outdoor outlets, turn them off at the circuit breaker. An unexpected electrical short can not only knock out power for your entire home but potentially cause an electrical fire.
Remove the Existing Cover
If your outdoor outlet already has a cover installed, it must be removed before proceeding with the new installation. Depending on the type of cover you may have to:
- Use a screwdriver to remove external screws for covers fixed on the wall
- Fully open the flaps, if it’s a bubble cover or similar designs
- Gently manipulate the cover loose if it’s designed to be lifted
Occasionally, covers may be damaged or bent, making them difficult to remove. In such cases, using a rubber mallet or a similar tool can help reshape the cover for easier removal. During this process, remember to check the fit periodically to avoid causing further damage.
Attach the New Cover
After removing the existing cover, it’s time to install the new one. All covers should come with manufacturer’s instructions, but in general, there are common steps involved.
For plastic or metal covers, ensure the housing sits flush against the outlet. Loosen the screws at the top and bottom of the outlet to slide in the housing with the backplate inserted, then tighten the screws to securely hold the place.
In the case of “in-use” covers, follow the same process but ensure the cover doesn’t obstruct the plug. Also, carefully remove the middle section of the seal if present. Moreover, for some models, there might be a small latch or tab in the centre which needs to be gently wiggled loose without damaging the cover.
Regardless of the type, connection of wires should be done according to their categories, i.e., hot wires (black and any colour other than green or white), neutral wires (white), and ground wires (green or bare copper).
Remember, this process can vary depending upon the specific design and make of your outdoor outlet cover. If you aren’t confident or unsure about any step, it’s best to rely on an expert. A professional electrician can ensure a safe and accurate installation.
Outdoor Electrical Outlet: Safety Precautions
Safe operation of all electrical devices is paramount and this is especially true for outdoor electrical outlets. Weather and waterproofing measures coupled with effective electrical grounding can drastically mitigate risks attached to outdoor outlets. These safety precautions can hinder electrical shocks, potential fires, and prolong the lifespan of your tools and devices.
Use Waterproofing Sealant
When it comes to shielding your outdoor outlet from environmental elements, adhering to the correct installation process is key. The use of a gasket, a cover plate, or a waterproof cover to seal the connection to the wall, is your first step towards safety.
As an outdoor outlet protector, plug covers are known to form a water-tight seal around the plate and plug lids, wrapping over the actual outlets when not in use. These waterproof covers, often known as ‘bubble’ or ‘flip-ups’, come in various designs and are precision-engineered to permit extension cords to protrude while maintaining protection against rainy conditions.
It’s worth noting that a perfectly sealed box and faceplate work wonders in waterproofing. A good seal at the outlets, between the box and the faceplate, and between the siding and the outlet box, enhances the protective measures. Regular inspection for leaks, moisture, corrosion, or any signs of damage further ensures long-lasting functionality.
Ensure Proper Electrical Grounding
To complement the waterproofing, optimal grounding is another pivotal aspect of your outdoor electrical safety. It’s crucial to know that mistakes in bracket compatibility during installation may invite undue moisture that can lead to tripped breakers and ruined outlets.
On the flip side, proper grounding goes a long way in curbing shock risks while simultaneously extending the lifespan of your electrical tools and equipment. A Ground Fault Circuit Interrupter (GFCI) outlet, recommended by certified electricians, clamps down on abnormalities in current flow, thus mitigating shock and electrocution risks.
As per the Canadian Electrical Code, GFCI outlets should be mandatory for outdoor electrical outlets situated within 2.5 metres of earth or water. The fantastic safety proposition of these outlets lies in its ultra-smart ability to sense an aberrant electrical path and break the circuit, thus acting as an outdoor outlet protector. Regular testing using built-in functions keeps it at peak efficacy.

Conclusion
Protecting your outdoor electrical outlets is crucial for their longevity and safety. You’ve got a variety of cover options, each with its unique pros. Plastic covers resist rain, dirt, and salty air, while metal ones offer durability. In-use covers are your go-to for outlets that are frequently in use. Installing these covers requires precision – from turning off the power supply to attaching the cover securely. Correct wire connection is paramount. Don’t forget the importance of waterproofing sealant and proper electrical grounding. These measures not only keep you safe but also extend the lifespan of your electrical equipment. Waterproof covers and a good seal at the outlets fend off the rain. Ground Fault Circuit Interrupter (GFCI) outlets are a smart choice for effective grounding. Regular check-ups and testing are the final steps to ensure your outdoor outlets function optimally and last longer. Here’s to safe and efficient outdoor power supply!


