Creating the perfect backyard ice rink is a winter dream for many, but snow slush can quickly turn your skating haven into a soggy nightmare. Snowfall, while picturesque, can be the arch-nemesis of your ice surface, leading to the dreaded slush that’s tough to shovel and can ruin your rink if not dealt with promptly.
In this article, you’ll discover the challenges of maintaining an ice rink amidst the whims of winter weather, and the best strategies to combat slush. From timely snow removal to the clever use of ice shavings and hot water, you’ll learn how to keep your rink smooth and skate-worthy all season long.
Backyard Rink Snow Slush
Maintaining a pristine backyard ice rink requires vigilance, especially when winter weather brings snowfall. Snow slush is the enemy of the keen skater and diligent rink owner due to water seeping through hairline cracks. Immediate action’s needed to preserve the ice surface. Letting snow accumulate or delaying the removal process can result in a slushy disaster, with chunks freezing into unwelcome obstacles.
Address slush effectively by scraping off the snow before it has a chance to settle. If you’ve been caught off guard by a nighttime snowfall, you’ll understand the frustration of finding part of your rink compromised by frozen slush.
Repairing holes and cracks might seem daunting, but ice shavings can be your ally. Using this readily available resource is simple:
- Pack ice shavings into any depressions or holes.
- Add a light sprinkling of water—just enough to wet the area without creating more slush.
- Smooth the surface, ideally with a puck or concrete trowel, until it’s even.
For those larger gouges or divots, a homemade slush mix of snow and water works wonders. Think along the lines of mudding a drywall seam; this technique will leave you with a level and skate-worthy rink surface.
On those seemingly warmer days, where the sun blazes and water runs down the streets, an insulating layer of snow can act as a protective blanket for your rink. It’s counterintuitive, but this method can prevent your rink from melting as rapidly. However, when it comes to frozen slush, hot water is your go-to solution. Pouring hot water over the affected area facilitates a quick melt, making it easier to scrape away the unwanted slush. A 48’x36′ rink may require around 5-6 buckets of hot water, but this small effort pays off in ensuring the ice remains smooth and skateable.

Why Does Snow Turn to Slush on a Backyard Rink?
The Role of Temperature
Managing a backyard ice rink during winter requires close attention to temperatures. Temperature fluctuations greatly influence ice quality, particularly when it hovers around freezing. Optimal ice formation occurs within a specific temperature range. Ideal conditions for a smooth, hard ice surface are between -10 and -15 degrees Celsius.
If the temperature rises above this range, the integrity of your ice can be compromised. For example, when you experience a warm spell followed by snowfall, the upper layer of your rink’s ice can become soft and begin to absorb the snow. This combination of partially melted ice and snow quickly leads to the formation of slush, which can prove hazardous and interfere with your skating experience.
Moreover, if the temperatures increase significantly, the water below can expand through hairline cracks in the ice, creating a layer of slush beneath the snow. This challenge is exacerbated when the temperature is near freezing (0 degrees Celsius), as this leads to a condition known as “shell ice”. A lighter water application is the rule when temperatures are warmer to prevent this fragile layer from forming.
Understanding the Effects of Sunlight
Sunlight can be both a friend and foe to your backyard rink. While sunlight during the colder months isn’t as intense, its heat can still affect the surface of your ice rink. White boards surrounding your rink may reflect sunlight, but they are often not enough to prevent melting. The introduction of additional measures such as 2’x4′ styrofoam panels can significantly shield your ice from the thawing effects of the sun’s rays for as little as £25, safeguarding the ice quality.
The positioning of reflective materials is critical and should be on the outside parts of the rink to fully insulate against the sun’s warmth. And don’t overlook the importance of adequate nighttime lighting to enhance evening skating sessions. Well-placed 500-watt flood-lights not only improve visibility but also discourage the formation of dew which can contribute to surface slush during overnight temperature rises.
On sunny days, especially during the latter part of winter, snow can act as a deceptive insulator. If a light snowfall occurs, it’s best to leave the snow on the rink’s surface until the evening if you plan on using it. Clearing it too early can lead to the sun’s rays exaggerating the melt and leave behind a mushy surface unacceptable for skating.
Maintaining optimal ice conditions in your backyard rink requires a strategic approach to both temperature control and sunlight management. By understanding these environmental factors, you can ensure a more consistent and enjoyable skating experience throughout the winter season.
Strategies to Prevent Snow Slush on a Backyard Rink
Proper Ice Thickness
It’s vital to maintain an optimum ice thickness to ward off the perils of snow slush. Achieving the right ice thickness can be the difference between a smooth skating session and a soupy mess. Here are the minimum measurements you ought to aim for:
Ice Thickness (Shallow Side) | Pitch/Slope | Ice Thickness (Deep Side) |
|---|---|---|
4 inches (10 cm) | 8 inches | 12 inches (30 cm) |
With an ice base of 4 inches, you provide a robust foundation that can endure the temperature swings known to mar a rink’s surface. Remember, consistent thickness facilitates a uniform freezing process and reduces the risk of under-melt and weakened areas where water can seep through causes unwanted slush.
Insulation Techniques
To combat the thawing effects of sunlight and fluctuating temperatures, insulation is your frontline defence:
- Purchase and apply reflective materials such as Styrofoam panels; a cost-effective solution to mirror sun rays away from your rink.
- Secure a waterproof liner to protect against under-melting; using adhesive methods such as polyurethane sealant can be key in sealing the deal.
- Be proactive with snow removal, especially during snowfall at night. It’s much harder to remove once it turns into slush.
- Regularly inspect and repair any signs of damage, using compressed snow and water – known as slush – to fill in gouges or divots, akin to mudding a seam in drywall.
By assiduously monitoring the ice and employing these techniques, you’ll significantly reduce the instances of snow-turned-slush, maintaining the integrity and enjoyment of your backyard ice rink.
Dealing With Snow Slush on an Existing Backyard Rink
Removing the Slush
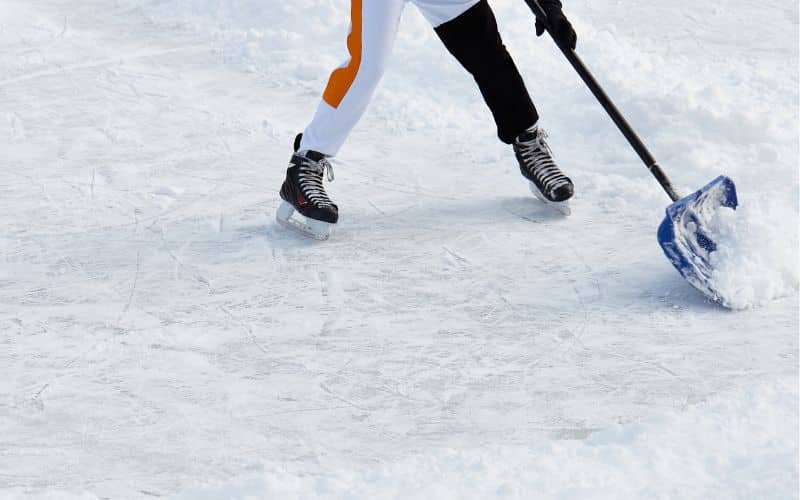
Immediate action is paramount when dealing with snow slush; it’s critical to prevent rink damage and preserve ice quality. Begin by clearing snow as soon as possible, especially after heavy snowfalls, to avoid water seepage which transforms pristine ice into problematic slush. If slush does form, tackle it quickly by shovelling, being careful not to dig into the ice layer beneath.
Utilise a snowblower for large rinks to save hours of laborious shoveling. In scenarios where only a portion of the rink is affected, start at the slush-end. Though arduous, removing slush ensures the rink remains uniformly solid. When snow coincides with mild temperatures and rain, prioritize eliminating any snow on the rain-soaked surface before it has the chance to refreeze.
The process is not without its intricacies. For instance, when slush covers vast areas, precautions must be taken. If the underlying ice isn’t solid enough to support weight, focus on the edges first. Once the surface refreezes and can bear the necessary weight, address the middle sections.
Adding a Top Layer of Ice
Constructing a resilient top layer of ice requires multiple thin layers of water, each frozen solid before applying the next. This method enhances the ice’s resistance to chipping, cutting, and cracking. It’s a systematic approach towards achieving a smooth, hard surface.
Layering ice can be a meticulous process that spans weeks and demands patience. When applying water, avoid excessive quantities; over-watering leads to a condition known as shale ice, noted for its bumpy traits. Instead, opt for thin layers, facilitating a solid freeze without expansion, yielding a glass-like finish.
Here’s an at-a-glance approach to improving your ice rink’s top layer:
- Start by administering thin layers of water.
- Allow each layer to freeze completely.
- Repeat the process to create a dense, hard surface.
- Avoid the pitfalls of shale ice by controlling water volume.
- For a robust initial base, consider using a liner with 4 inches (10 cm) of water for the first freeze, leading to ‘softer ice’. Subsequent layers during resurfacing will fortify the rink with the desired hard ice.
The resulting surface, post-liner installation or meticulous water layering, should support skate blades with minimal damage and provide a consistently enjoyable skating experience. Remember, the quality of your rink’s surface hinges on the methods you apply to preserve its integrity against the elements.

Maintaining a Slush-Free Backyard Rink
Protecting your backyard ice rink from slush is essential for a smooth skating experience. Slush forms when snow melts slightly and then refreezes, potentially causing uneven surfaces and ultimately damaging the rink’s integrity.
Immediate Snow Removal Is Crucial After a snowfall, act fast to prevent slush formation. Remove snow before it has a chance to melt and seep into cracks, creating slush. Quick action ensures the rink remains usable and extends its lifespan.
Enlist Help for Larger Rinks When facing a substantial amount of snow or a larger rink:
- Gather a team to tackle the snow removal.
- Ensure the entire team understands the importance of clearing all snow to avoid frozen obstacles later on.
Addressing the Perimeter Slush If slush appears only at the edges:
- Begin cleaning from the edges inward.
- Be thorough and do not leave any slush behind as it will freeze and disrupt the rink’s surface.
Repair Gouges and Divots Promptly For any damage to the ice:
- Mix snow and water to create a patching slush.
- Apply the mixture to damaged areas, smoothing it like mudding a drywall seam.
By incorporating these practices, you maintain the quality of your backyard rink and ensure that it remains an enjoyable place for skating throughout the season.
Conclusion
With the right approach, your backyard rink can remain a winter wonderland free from the woes of snow slush. Remember, prompt snow removal and dealing with perimeter slush are your best defences. Should any damage occur, it’s not the end of your ice escapades—quick repairs can restore the fun. Stick to these simple maintenance tips and you’ll ensure your rink stays in top shape for friends and family to enjoy all season long. Keep your skates sharp and your shovel ready, and you’re all set for an uninterrupted glide on your personal icy haven.


