Building an igloo in your backyard might sound like a childhood fantasy, but it’s a fun and achievable winter project that can bring a touch of Arctic charm to your home. Whether you’re looking for a cool playhouse or just want to test your survival skills, constructing an igloo is a unique way to make the most of a snowy day.
Materials Needed
Snow
When I set out to create my backyard igloo, snow quality was paramount. Packed snow, specifically, was what I needed–no fluffy, unworkable snow. I’ve found that snow that’s both fresh and sticky offers the best consistency for constructing solid walls. You might need a lot of it so don’t hesitate to ask the neighbors. As for forming the building blocks, you can use a blue box or any container half its size to mold the snow. Pack in the snow, turn the container over, and there you have it–your homemade snow brick ready for assembly.
Ice Blocks
Ice blocks are a staple material for igloo construction, providing a durability that snow alone can’t achieve. I learned that it’s best to use plastic tubs as molds for uniformity and ease of stacking. A plastic snow saw is the tool of choice to shape these blocks and prevent injuries during cutting. Remember, it’s crucial to bring the ice blocks to room temperature for approximately 90 minutes before unboxing to prevent them from cracking when you begin building. To keep the igloo robust and standing longer, I discovered that freezing a thin layer of water on the snow bricks made a significant difference. It’s the strength of ice that can help maintain the igloo’s structure through the winter season.
Location Selection
Site Preparation
When I’m gearing up to build an igloo, the first thing I tackle is preparing the site. This is a critical step that can’t be rushed. First off, I pack down a large area of snow. Snowshoes or a snowmobile are my go-to tools for this job. It’s important to go over each spot at least three times. Why? Because you need that snowpack to be solid — we’re talking an eight-inch base, at the very minimum. Once packed, I’ll measure the depth to ensure it’s no less than 2 feet deep. You’re looking for that sweet spot where the snow is consistent enough to hold its shape but still manageable to cut and carve.
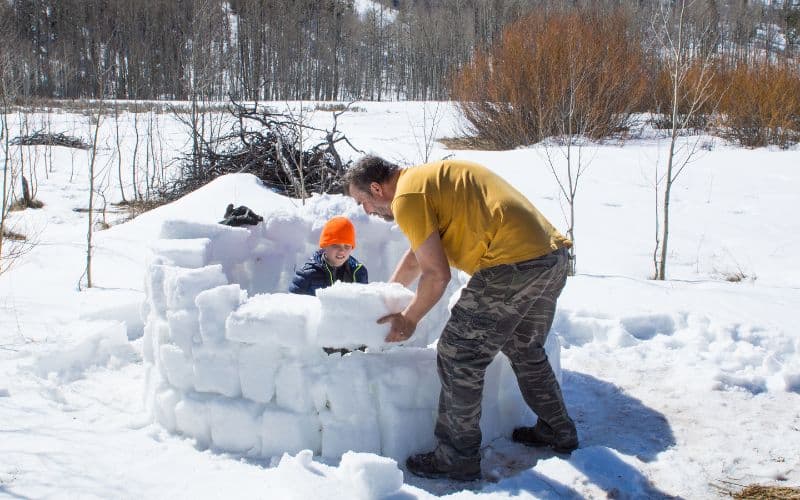
Next, I cut blocks from the pack, arranging them strategically. My last project gave me a trench roughly 60 cm wide — ideal for stable walls. I lean blocks against each other, and here’s where the meticulous work comes in: I shave the edges so they interlock, forming that perfect triangle shape that’s essential for igloo integrity. Always remember to angle the trench away from prevailing winds for added protection.
Terrain Considerations
Selecting the right terrain is paramount. In my experience, an igloo is as strong as its foundation. That’s why I say prioritize a hillside building site for your igloo. It’s not just about aesthetics; hillsides naturally protect against the elements, offering stability and benching out cold-air sinkholes. Now, here’s a pro tip: steer clear of free-standing mounds. They might just be logs or boulders under a layer of snow, and that’s trouble waiting to happen.
I’ve roamed my share of backyards and hiking trails, and I always carry a snow prod or a long stick with me. It’s not for the looks; it’s my trusty tool to probe the snow and verify that my chosen space has no hidden surprises. Once I’ve ascertained the area is free of obstacles, it’s on to shape that outer wall. Every experienced builder knows a poorly outlined wall means a shaky igloo — and that’s not a risk I’m willing to take.
After the hard work, if I want to add some aesthetic flair to my igloo, I might place a snowflake light projector about 15 feet away to highlight the walls with a touch of winter wonder. And for those unforgettable family gatherings, why not hang some silver ornaments from the ceiling with fishing line? It turns a simple igloo into the centerpiece of a winter wonderland.

Designing the Igloo
Igloo Dimensions
When mapping out my igloo’s design, size matters. The diameter of my base is pivotal; I aim for seven feet for a communal space. I’ve learned never to build an igloo with a diameter larger than 10 feet, as achieving a perfect dome is nearly impossible without special tools. Amidst the excitement of constructing a sizeable igloo that fits my whole family, I ensure that the dimensions are manageable to maintain structural integrity.
Creating the Base Layer
I start by drawing a circular outline in the snow; a nearly-perfect circle is crucial for a solid foundation. This means cutting the base of my igloo must be done precisely—the halving technique allows me to slope the block arrangement gradually. I lay my blocks side by side, ensuring they’re packed tightly to pull moisture away from the interior — much like the base layer of clothing I wear, which pulls moisture away from my body.
Building the Walls
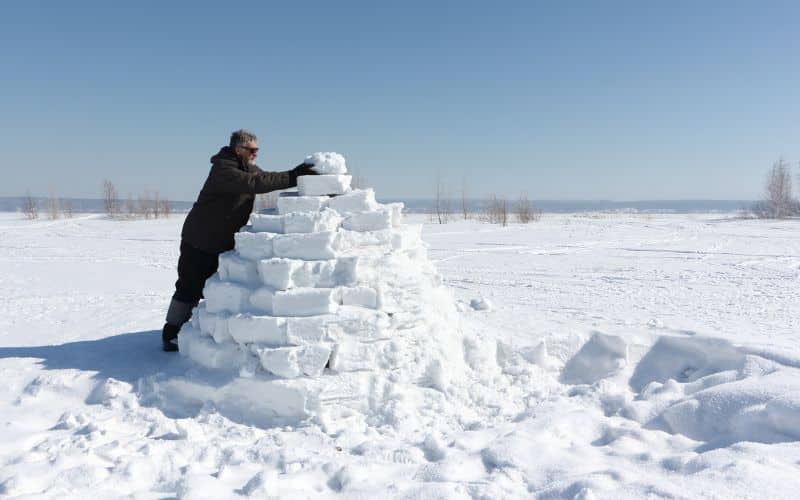
I carefully stack the snow blocks, cutting each block at a slight incline at the top. This incremental titling inwards creates the igloo’s signature dome shape. The key is to stack and overlap each row towards the igloo’s center, ensuring stability. As I keep building up, the dome begins to take shape until it’s time to carefully carve out the entry and roof vents—vital for air circulation.
Roof Construction
Dome Formation
Building the roof of an igloo is an exercise in precision and patience. Roof Construction starts by stacking pre-made blocks, ensuring they overlap towards the interior for greater stability. To prevent running out of materials halfway through, I make about 15 blocks and stockpile them inside, avoiding the hassle of crawling back and forth through the entrance. This foresight pays off, particularly when adding the final 2 roof cap blocks—a critical step that seals the igloo and completes the dome.
The blocks naturally angle inwards, creating a self-supporting spiral dome that’s surprisingly strong. Stability is key here, so I take extra care to pack snow into any gaps, both inside and out. I also make a note to smoothen the inner dome later, avoiding melting snow from dripping on my sleeping area.
At times, I find that due to my base being too wide, I need a small step ladder to reach the top—a handy tip to remember for those constructing larger igloos with diameters nearing the 10-foot mark. Despite the challenges, the dome’s artisanry becomes evident as the snugly fitted blocks form a sturdy, weather-resistant shelter.
Insulation Process
Insulation is what transforms a mere structure of snow into a snug refuge from the elements. The magic behind this is snow’s thermal and insular properties. After sealing the dome, I go inside to pack additional snow over the inner layer of the dome, which acts like cement, filling in cracks and securing the structure.
For optimal insulation, the walls must be thick enough to support the weight of the roof. The interlaced pattern of blocks between the igloo’s sidewalls and the arched entrance fortifies this concept. As I pack snow onto the external dome, giving it that quintessential rounded appearance, I’m also enhancing its insulative capacity.
The interior smoothening is crucial as warmth from a small lamp or body heat can cause snow to melt. By creating smooth surfaces inside, water droplets run down the sides rather than dripping onto my gear. This, combined with raised sleeping platforms, ensures I stay dry and warm through the night. Remember, snow is an excellent insulator—an igloo’s interior can be up to 40 degrees Fahrenheit warmer compared to the outside air. Sintering, too, plays a role in insulation, as it naturally compacts the snow over time, making it more solid and robust against harsh conditions.

Finishing Touches
Doorway Creation
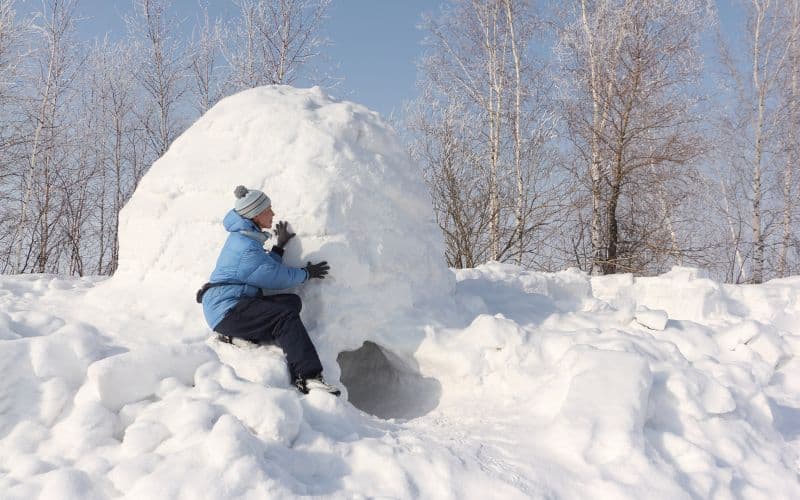
Building the doorway to my snow haven is a mix of function and form. I start by eyeing the wall at about eye-level height and carve a hole directly through. This becomes the top of my entrance which I’ll then shape into a tunnel. By digging downward into the entrance, I’m creating a sinkhole where colder air can collect, keeping the interior of the igloo warmer.
The key here is to implement an upside-down V using the block I’ve saved from the entrance. This isn’t merely decorative—it’s a clever design to better insulate the entrance, making my igloo not only a cool backyard structure but a functional survivalist shelter. I angle the entrance away from prevailing winds to keep out drafts and position the two halves of the snow block outside the entrance to act as a windbreaker.
Ventilation
The iconic dome shape of my igloo might be picturesque, but it needs to breathe too. Ventilation is critical; without it, there’s a real risk of carbon dioxide buildup. I carefully cut small, crescent-shaped vents into the top or sides of the igloo. This design choice is done with both safety and structure in mind, as these shapes allow air to flow without compromising the igloo’s stability.
I’m also mindful of larger vents that might let out too much precious warmth. My solution is to pack snow lightly over these vents to regulate airflow and temperature—a perfect balance between safety and snugness.
Decorations
Now for the final touch—decorations! No igloo would be complete without a personal touch to make it truly mine. I’ve seen some go as high as to add a snowflake light projector a good 15 feet outside, casting enchanting patterns on the igloo’s walls. For a simpler touch, I opt for silver ornaments delicately hung from the igloo ceiling. It’s like being inside a snow globe!
Though it might seem superfluous, these small additions serve a purpose beyond aesthetics. They’re a perfect talking point for when I show off my handiwork to friends and family. And of course, they’re a hit at any winter gathering held within this chill yet cozy setting. Whether hosting an epic New Year’s Eve bash or enjoying a quiet night in this frosty fortress, the decorations add that final, magical touch.
Conclusion
Building your very own igloo is an adventure that’s both rewarding and educational. I’ve shown you how to craft a sturdy structure, right in your backyard, with a focus on safety and personal touches. Remember, the key to a successful igloo is not just in the construction but also in the details like proper ventilation and a well-shaped entrance. Now that you’ve got the know-how, it’s time to get out there and create a winter wonderland of your own. Don’t forget to add your unique flair with some decorations. Happy building!


